By Kosmas Raptis on December 7, 2021
Prologue
You saw that pun with the title coming from a mile away didn’t you- er I mean hello there!
This is Kosmas speaking. Today we are going to talk about control flow in C- oh wait, no, that’s the wrong tutorial!
Good day!
It’s me again. Glad to see you here! Today we are going to see how to set up a programming environment for the Rust programming language so we can create some programs using it. So, let’s get right into it!
NOTE: This tutorial series will always be using the latest available Rust edition at the time of writing (in this case, Rust 2021).
Benefits of Rust
Rust is a programming language that aims to rival programming languages like C, which are meant for systems programming. It has the same execution speed as C and C++, which are some of the fastest languages around, but has the added benefit of memory safety. This is good, because it means that we can never have memory errors caused by our program (as long as we don’t do absolutely insane and unreasonable things with memory). This is also a hit for programming time as you will find youself spending lots of time fighting the compiler in the very beginning. For this reason, getting used to writing Rust code can be quite different from other languages. It also has benefits like guaranteed no data races at runtime (see Additional Resources). As all these checks are done during compilation, it means that they don’t make our programs slower.
What we are going to set up
If you’ve read any of our C tutorials, you might know the drill. Compiler, build system and IDE or text editor. Pretty simple. But, if you haven’t read them, let me take a moment here to explain in detail.
IDE (Integrated Development Environment)
First, we’re going to talk about what an IDE is. IDE (not to be confused with that old storage media protocol with the same acronym but different name) stands for Integrated Development Environment. It’s an application that allows us to write our code and also comes bundled with everything we’re going to need to run that code. Alternatively, you can just use a text editor to write code without the application having a bundle of the required execution tools, and instead opt to manually use the tools yourself. This is also the approach we’re going to use. We’re going to set up Microsoft’s excellent Free and Open Source Visual Studio Code text editor. Please, note that if you have already set up an IDE or a text editor from the past, this step can be skipped, as long as your IDE supports Rust or at the very least basic convenience features for Rust. Now, you can follow along without an editor or IDE with Rust support, but writing code can get a bit tedious without these features.
Compiler
Now, this one is simpler. A compiler is simply just a tool that we run our code through to get an executable binary. Too complicated? Let me explain better.
You are writing your brand new shiny program in Rust. However, your computer does not understand Rust, but only machine language, so it wouldn’t know how to run a Rust program.
A compiler is a tool that takes your Rust code and converts it to the machine language your computer understands, so you can run your program. Each programming language has a different compiler (or interpreter, in some cases. Rust doesn’t use an interpreter, so we’re not going to dive into that, but I will leave a link in the Additional Resources section for the curious to read about the difference between compilers and interpreters).
So, as you might have understood, the compiler is basically the core part of the programming language, the only way we can actually use it to do something.
For a language like C, a lot of compilers are available. However, in Rust, there is only one compiler, the official one. So that’s what we’re going to set up.
Build system
A build system is a program that can instruct the computer how to properly use the toolchain of our programming language (compiler, linker etc.) to build a binary out of our project. Commonly, it’s used for projects that consist of more than 1 file that holds code (so pretty much always). That, however, doesn’t mean that you can’t use it for small projects too.
Rust uses a build system called Cargo, and this is what we’re going to be using
Now that we’ve explained what we need and why, let’s do the actual installation.
Installing Visual Studio Code
First, we’re going to set up Visual Studio Code. This is rather simple, just head over to the download website and download the file that corresponds to your computer. If you are running Windows and you are not sure whether you have a 32 bit or 64 bit computer, think how old it is. If your computer was made in 2007 or later, it’s almost certainly a 64 bit computer. If you bought it in 2010 or later, then it’s definitely a 64 bit computer.
If you are one of the daring few who are following these tutorials from an embedded computer, like a Raspberry Pi or a modified mobile phone, then you are looking for ARM executables.
After you download the install file, the setup guide will guide you through the installation process step by step, if you’re on Windows. On Linux and Mac, there is only one standard way of using install files (and that is, use your package manager on Linux or copy to your Applications folder on Mac), so go ahead and do that.
After setup is done, go ahead and fire up Visual Studio Code! You will be greeted by a rather simple looking menu, looking something like this:
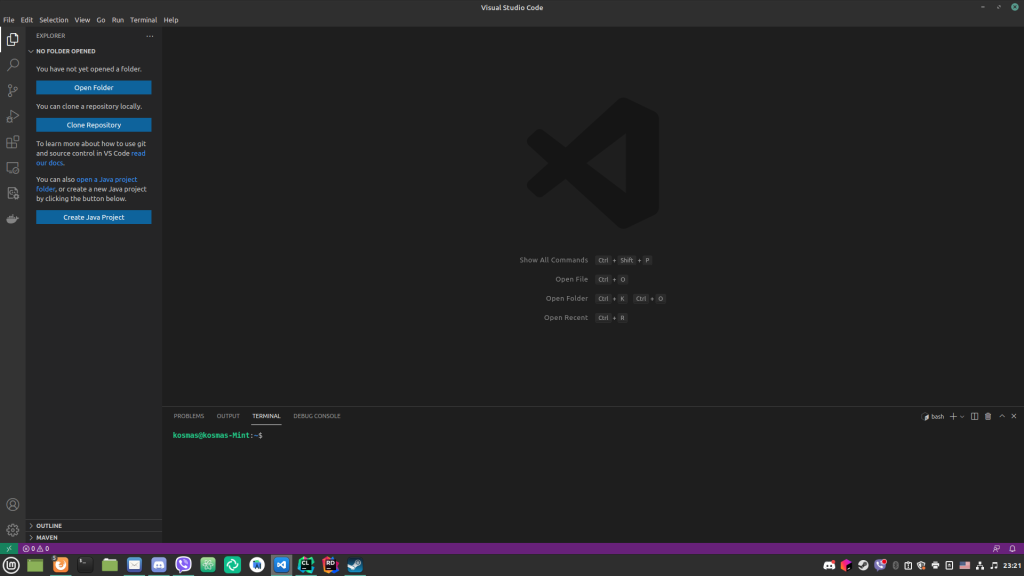
The toolbar is on the left, reaching out from it is the explorer that allows you to quickly browse the files in your project, next to it the main editor window in the center, and, optionally, any tools or terminals in the lower part of the screen.
Once you’re here, you’ll want to head over to the Extensions Marketplace (That blocky icon on the toolbar, to the left). You can do this very quickly by pressing the button combination Ctrl Shift X (Command instead of Ctrl on Mac). Search for the Rust extension, specifically, we want to install this one, which is the official extension for Visual Studio Code.
That’s it for setting up Visual Studio Code. We’re now going to install a Rust toolchain.
Installing the Rust toolchain
This step is also very easy, thanks to the community that has made an easy, automated installation script for the toolchain. This script can easily be downloaded from the Rust website. The website (and the script) will guide you all the way through the installation.
This installed the Rust toolchain to our system. Now, let’s install the Cargo build sys- wait, no, the toolchain also comes with Cargo! No need for that!
(Additionally, the toolchain not only comes with all the required tools, but also documentation to figure out Rust’s workings. Reading Rust documentation is a topic for another day, though.)
This means we’re all set for some nice Rust programming! Sweet!
The origin of all creation: “Hello, World!”
Create a directory where you want to hold your project code. Then, use a terminal or command line to enter it. Type the command cargo init hello. This will create an empty Cargo project with the name hello.
Go ahead and open that directory in Visual Studio Code from the File menu of it (or, alternatively, right click the directory and press “Open with Visual Studio Code”).
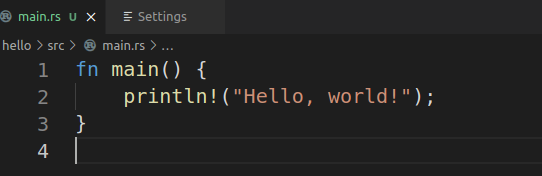
You’ll notice how Cargo created some files for us. Specifically, Cargo.toml, Cargo.lock, .gitignore, a target directory and an src directory containing a main.rs file. .rs is the file extension used to identify Rust code files, and main.rs is usually the name of the basic source file that contains the project’s entry point (the point where the computer starts executing code).
Let’s see what each file is:Cargo.toml – Cargo’s main configuration file. Defines any external libraries we might need, the Rust edition, your contact info etc.Cargo.lock – A file generated by Cargo to lock your libraries to a specific version so that updating the libraries won’t break your program..gitignore – Not necessary if not using Git, it just tells Git which files to ignore from its repositorysrc/main.rs – The main code file
If you open src/main.rs, you’ll notice that there’s already some code in it:
Let’s see what each line does:
First, we have fn main() {
This line defines a function (fn and () after the name) called main. This must always exist, as it’s the entry point of our program, meaning the computer starts executing our code from there. The { after the parentheses indicate that now we are starting the function.
Next, you will see println!("Hello, world!");
This line PRINTs a LiNe that says Hello, world! You’ll notice that to give it the text, we use quotes, just as we would use to refer exactly to a piece of text in a spoken language. You might notice a ! and a ; there. These have their own purposes. Specifically, the ! is used to indicate that println here is not a function, but rather a macro. We will dive into macros in a future tutorial. As for the ;, it’s used to indicate that we have finished writing our command and the compiler can now move on to the next one.
Lastly, the } is used to show the end of the function.
You also might have noticed that we didn’t need to include anything to get access to println!. Coming from other languages, this might seem weird, as usually you need to include some language library that allows you to write output. In Rust, this functionality is built into the prelude (see Additional Resources), which is included by all projects by default. Thus, we don’t need to include anything.
To run this program, open a new terminal in Visual Studio Code (under the Terminal menu), and run the command cargo run. This will compile and run your program. You should see output like this:

If this is what you got, great! You succesfully set up a working Rust toolchain! If it’s not, then you might want to double check you did every step here carefully.
Closing
This was a small setup for Rust. In the next tutorials, we will dive deep into the language and explain everything. For now, this is just enough to get up and running. I hope you followed today’s tutorial with no problems! Have a great day!
Additional Resources
Interpreter vs compiler, Programiz
Systems Programming, Wikipedia
Rust vs C for hardware abstractions, opensource.com
